Thawing Frozen Pipes Safely: A Step-by-Step Guide to Preventing Burst Pipes and Water Damage
When temperatures plummet below freezing, the water inside your home’s plumbing can turn to ice, expand by nearly nine percent, and generate pressures exceeding 25,000 pounds per square inch against pipe walls. Thawing frozen pipes safely is not just about restoring water flow — it’s about preventing a catastrophic burst that can release hundreds of gallons of water into your home within hours. Every winter, frozen and burst pipes cause roughly $1 billion in property damage across the United States, according to insurance industry estimates. This guide walks you through the exact steps to identify, thaw, and protect your pipes so you never become part of that statistic.
How to Tell If Your Pipes Are Frozen
Before you can fix the problem, you need to confirm it. Frozen pipes share a consistent set of symptoms that are easy to spot once you know what to look for.
Reduced or no water flow. You turn on a faucet and get nothing — or a weak, sputtering trickle. This is the most common first sign of a frozen pipe, especially when only one fixture or one section of the house is affected.
Visible frost on exposed pipes. Check unheated areas such as the garage, crawl space, basement rim joist, and exterior walls. A layer of frost or ice crystals on the outside of a pipe is a clear indicator that the water inside has frozen.
Unusual odors from drains. When a pipe is completely blocked by ice, sewer gases that would normally flow downstream can push back toward the only available opening — your drain or faucet.
Bulging or cracked pipe sections. Ice expansion can deform copper, CPVC, and even PEX tubing. If you see a visible bulge, that section has already experienced extreme stress and may be seconds away from failure.
The pipes most vulnerable to freezing are those in uninsulated exterior walls, unheated crawl spaces, attics, garages, and any supply line running along an outside-facing wall. Kitchen sink supply lines on exterior walls and outdoor hose bibs are among the most frequent failure points.
What You Need Before You Start Thawing
Gather your tools and materials before applying any heat. Having everything ready reduces the time the pipe spends in a partially frozen state, which is when the risk of a pressure burst is highest.
You will need a hair dryer or heat gun set to low, a portable space heater, towels soaked in hot water, electrical heating tape or heat cable, a bucket and mop for potential drips, and a pipe wrench or adjustable wrench in case a fitting needs attention. If you suspect a pipe has already cracked, also have your main water shut-off valve location identified and your plumber’s emergency number on hand.
One critical safety note: never use an open flame torch, propane heater, charcoal stove, or any combustion-based heat source to thaw pipes indoors. The Insurance Institute for Business and Home Safety warns that open-flame thawing is a leading cause of residential fires during winter cold snaps. It also risks superheating water inside the pipe, creating steam pressure that can cause an explosive failure.
How to Thaw Frozen Pipes Safely: Step-by-Step
Follow this process in order. Each step is designed to minimize pressure buildup and give you the earliest possible warning if the pipe has already been compromised.
Step 1 — Open the Affected Faucet
Before applying any heat, open both the hot and cold handles of the faucet served by the frozen pipe. This serves two purposes: it provides an outlet for expanding water and steam as ice melts, and it gives you a real-time indicator of progress. When water begins to trickle, you know the blockage is clearing.
Step 2 — Locate the Frozen Section
Trace the supply line from the open faucet back toward the water main. Feel along the pipe with your hand — frozen sections will be noticeably colder, and you may detect frost, ice, or a slight bulge. In many homes, the blockage occurs within the first six feet of where the pipe enters an exterior wall or passes through an unheated space.
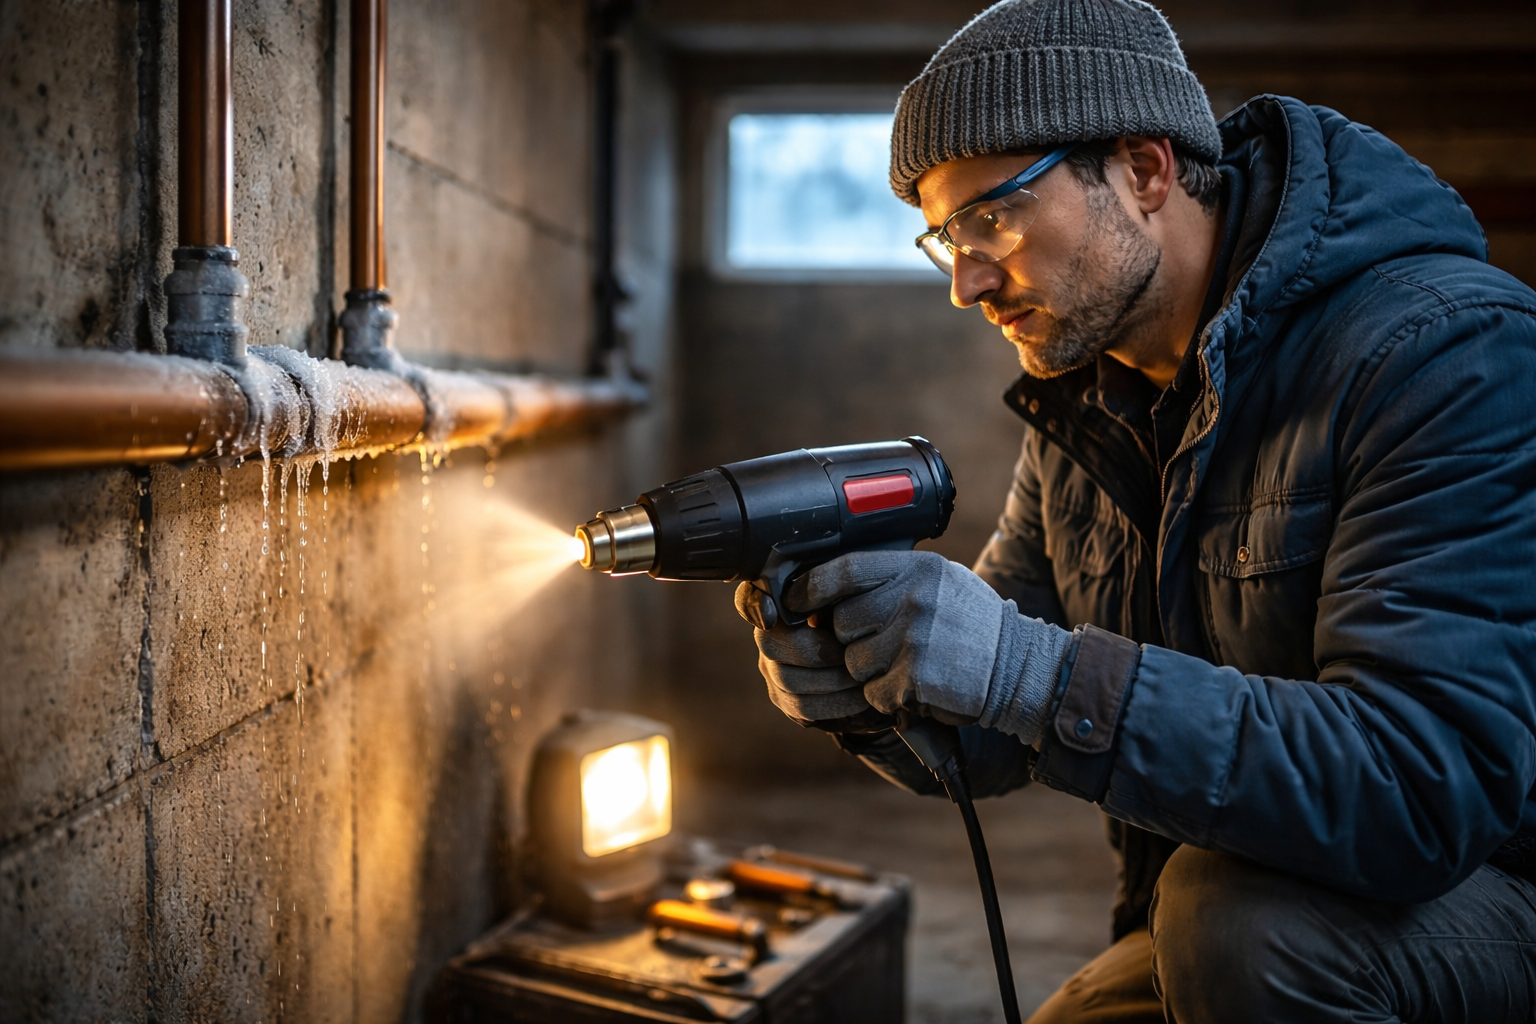
Step 3 — Apply Heat Starting at the Faucet Side
This is the most important directional rule in safe pipe thawing. Always begin applying heat at the point closest to the open faucet and work backward toward the frozen section. Heating the middle of a frozen blockage first traps expanding steam between two ice plugs, dramatically increasing the risk of a burst.
Hair dryer method. Hold the dryer six to twelve inches from the pipe and sweep it back and forth along the frozen area. This is the safest and most controlled approach for accessible pipes. Expect thawing to take 20 to 45 minutes depending on the length of the frozen section and the ambient temperature.
Hot towel method. Wrap towels soaked in hot water around the pipe. Replace them every five to ten minutes as they cool. This works well for pipes in tight spaces where a hair dryer is difficult to position.
Electrical heat tape method. Wrap thermostat-controlled heat tape spirally around the frozen section according to the manufacturer’s instructions. Plug it into a GFCI-protected outlet. Heat tape provides even, sustained warmth and is especially effective for long frozen runs inside walls or crawl spaces.
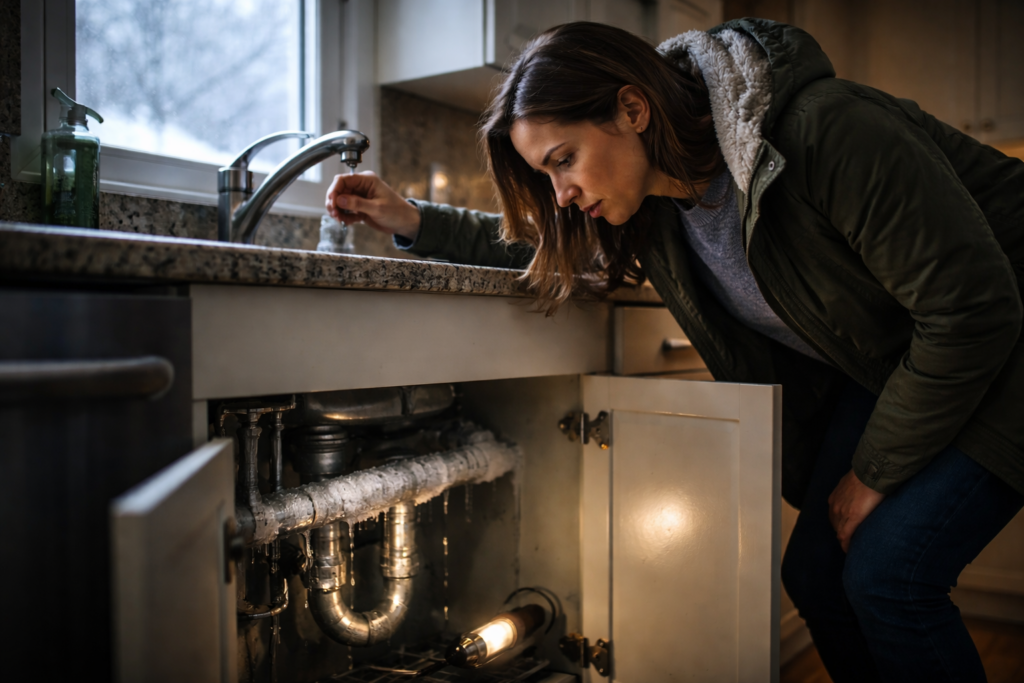
Portable space heater method. Position a space heater in the general area of the frozen pipe — for example, inside a cabinet under a kitchen sink or aimed at an exposed crawl space section. Keep the heater at least three feet from any combustible material and never leave it unattended.
Step 4 — Monitor for Leaks as Flow Returns
As the ice melts, water will begin to flow. Inspect every visible inch of the previously frozen section for drips, sprays, or wet spots. Hairline cracks caused by ice expansion may only become visible once pressure returns. If you discover a leak, shut off the main water supply immediately and call a licensed plumber.
Step 5 — Run Water Fully to Confirm the Line Is Clear
Once full flow is restored, let the faucet run for two to three minutes. This flushes any remaining ice fragments, confirms the entire line is open, and helps you verify there are no secondary blockages downstream.
What to Do If the Frozen Pipe Is Inside a Wall
Not every frozen pipe is accessible. When the blockage is behind drywall, inside a ceiling cavity, or buried in insulation, your safe options narrow but do not disappear.
Turn up the thermostat. Raising your home’s interior temperature to 75–80°F can slowly warm pipes inside wall cavities, though this method may take several hours.
Open cabinet doors. For kitchen and bathroom pipes on exterior walls, opening the cabinet doors allows heated room air to reach the pipe cavity.
Use an infrared heat lamp. An infrared lamp aimed at the wall surface where you suspect the freeze can gently warm the area without damaging paint or drywall. Position it 12 to 18 inches from the wall.
Call a professional. If you cannot locate the frozen section or if the pipe is deeply embedded, a licensed plumber can use specialized pipe-thawing machines that send a low-voltage electrical current through the pipe to generate safe, even heat from the inside out. This is the fastest and most reliable method for concealed pipes, typically resolving a freeze in under 30 minutes.
When to Call a Plumber Instead of Thawing Yourself
DIY thawing is appropriate for accessible, exposed pipes with no visible damage. However, several scenarios demand professional intervention.
Call a plumber if you cannot locate the frozen section after tracing the entire visible line. Call if you see a bulge, crack, or active leak on the frozen pipe. Call if multiple pipes in different areas of the home are frozen simultaneously — this suggests a systemic insulation or heating failure that needs expert diagnosis. Call if the pipe is made of galvanized steel, as older steel pipes are more brittle and more prone to catastrophic failure during thawing. And call if you have thawed the pipe but water flow does not return to normal within an hour, which may indicate a secondary blockage or a collapsed pipe section.
Emergency plumber rates for frozen pipe service typically range from $150 to $500 depending on your region and the complexity of the repair. Burst pipe water damage restoration, by contrast, averages $5,000 to $70,000 according to data from the Insurance Information Institute — making the service call one of the best investments you can make during a cold emergency.
How to Prevent Pipes from Freezing in the First Place
The most cost-effective frozen pipe strategy is to never have one. These preventive measures address the root causes of pipe freezing and can be implemented before the next cold snap.
Insulate vulnerable pipes. Foam pipe sleeves cost less than $1 per linear foot and can raise a pipe’s freeze threshold by 10–15 degrees. Prioritize supply lines in crawl spaces, attics, garages, and exterior walls.
Seal air leaks around pipe penetrations. Cold air drafts through gaps where pipes pass through exterior walls, rim joists, and foundations are a primary freeze trigger. Use expanding foam or caulk to seal every penetration point.
Keep interior temperatures consistent. Never set your thermostat below 55°F, even when away from home. The modest energy cost is insignificant compared to burst-pipe damage.
Let faucets drip during extreme cold. A slow drip — roughly five drops per minute — keeps water moving through the pipe and relieves pressure buildup. Focus on faucets served by pipes on exterior walls.
Disconnect and drain outdoor hoses. A connected garden hose traps water in the hose bib and the connected supply pipe. Disconnect the hose, close the interior shut-off valve for that line, and open the exterior bib to drain residual water before the first freeze.
Install a water leak detection system. Smart water sensors placed near vulnerable pipes can alert your phone within seconds of detecting moisture, giving you time to shut off water before catastrophic flooding occurs. Whole-home automatic shut-off valves take this a step further by stopping flow the moment a leak is detected.
Protect Your Home Before the Next Freeze
Frozen pipes are one of the few plumbing emergencies where the window between “minor inconvenience” and “major disaster” is measured in hours — sometimes minutes. Thawing frozen pipes safely requires patience, the right tools, and a clear understanding of when professional help is the smarter choice.
If you have experienced a frozen pipe this season, treat it as a warning sign. The same pipe will freeze again under similar conditions unless the underlying insulation, air sealing, or heating deficiency is corrected. Contact a licensed plumber to assess your home’s freeze risk, insulate vulnerable lines, and install preventive solutions such as heat cable or an automatic shut-off system before the next deep freeze arrives.
Acting now costs a fraction of what a burst pipe will cost later. Your home — and your peace of mind — are worth the call.